5 Simple Steps to Replace the Tape in an Automatic Tape Dispenser in India
Are you looking for Simple Steps to Replace the Tape in an Automatic Tape Dispenser in India? then you are in right place An automatic tape dispenser in India is a handy tool for offices, workshops, production units, and even for DIY enthusiasts. While the dispenser itself is fully automatic, you need to replace the tape manually once a roll finishes. Follow the simple steps mentioned in this post to easily and quickly replace the tape
Adhesive tapes are now of many different types to suit various applications. From households to industrial units, adhesive tapes are used for many different applications. While a tape dispenser was an excellent upgrade to manually pulling out the tape and cutting it, an automatic tape dispenser has significantly enhanced the convenience offered by tape dispensers.
Compatible with many different types of tapes, these automatic dispensers can be configured for many different cutting lengths as per your requirement. But while the process of pulling the tape and cutting it at desired length is automatic, you still need to replace the tape roll manually once it is over. Use these simple steps for replacing-
- Remove the empty tape roll
While automatic tape dispenser in India is now available in many different designs, the tape replacement process is more or less the same. Push the empty tape roll away from the cutting head and lift it straight up. You’ll see that the small spindle which holds the tape in place on the dispenser will also come out.
- Remove the spindle from the empty roll
Once the empty tape roll has been removed along with the spindle, gently push the spindle to remove it. It should come out very easily. When removing the tape roll from the dispenser, make sure that you stay away from the cutting head. Many modern dispensers now feature a safety guard on the cutting head for safety.
- Insert the spindle in the new tape roll
Now, insert this spindle in the small hole of the new tape roll just like it was fixed in the empty tape roll. Make sure that the spindle fits the hole perfectly. To avoid any kind of difference in the tape roll size, it is better to purchase the same tape roll from the same manufacturer or buy them in bulk from one of the top suppliers of soldering station in India as most of them also offer such automatic tape dispensers and many different types of adhesive tape.
- Replace the spindle on the dispenser
Now that the spindle is fixed into the new tape roll, replace the spindle on the dispenser. Lift the dispenser, and you’ll see that there are grooves on both sides of the dispenser for attaching the spindle. Just roll the spindle forward, and it’ll take its place. Just make sure that the roll’s end is towards the cutting head of the dispenser.
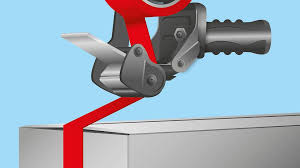
- Pull the tapes edge and place it on the cutting head
When you’ve attached the spindle, just pull the edge of the tape roll and place it on the cutting head of the tape. You can now select the length at which you want the dispenser to cut the tape. The new tape roll is now ready to use.
Automatic tape dispensers are very commonly used in commercial applications for the convenience and time-savings they offer. They are easy to use and eliminate the mess generally involved in manually cutting tape. Now that you know how to replace the tape roll in one such dispenser, put this knowledge to use to ensure utmost convenience and safety every time you want to replace the tape roll. this are Simple Steps to Replace the Tape in an Automatic Tape Dispenser in India