Defoliation, a crucial concept in gardening, is often overlooked by beginners and sometimes even experienced gardeners. This simple practice involves the selective removal of leaves from plants to optimize their health and productivity. This article will shed light on the process, its benefits, and particularly its application to autoflowers. So whether you are a seasoned green thumb or just starting out with your first seed starting container, this guide will help you understand and apply defoliation effectively to ensure your plants flourish.
In this article, we’ll explore:
- The Basics: Understanding what the process is and why it’s a crucial practice for gardeners wanting to optimize plant health and maximize productivity.
- Benefits of Defoliating Autoflowers: How it can specifically benefit autoflowering plants by improving light penetration and air circulation, leading to stronger, healthier growth.
- Practical Application: Step-by-step guidance on how to correctly defoliate your plants, including when to start and how often to perform this task, to ensure you’re doing it effectively and safely.
Why Defoliate?
When you defoliate a plant, you are essentially removing unnecessary or damaged leaves. This technique can prove beneficial in myriad ways. Here are some key benefits to help understand its importance:
- Boosts Photosynthesis: By removing excess foliage, you provide the remaining leaves better access to sunlight, the vital resource plants need to perform photosynthesis and produce their food.
- Enhances Growth: With this process, you can direct a plant’s energy towards growing bigger and healthier. Rather than spreading resources thinly across many leaves, the plant concentrates its effort on fewer leaves, promoting better growth.
- Improves Air Circulation: Overcrowded plants tend to have poor air circulation, which can lead to diseases and pest infestations. It reduces the density of the foliage, improving the overall airflow around the plant.
- Prevents Disease: It helps in controlling diseases that thrive in damp and shaded conditions. By thinning out the leaves, you reduce the likelihood of such conditions occurring.
- Promotes Fruit and Flower Production: For plants that bear fruit or flowers, it can help increase yield. By channeling energy away from superfluous leaves, more can be dedicated to the development of flowers and fruits.
When to Defoliate
The timing is crucial to ensuring maximum benefits for your plants. It’s essential to wait until your plant has reached a certain growth stage before starting. This stage is typically after the seedling phase, when the plant has developed several sets of leaves and is growing at a steady pace.
It should be done during the vegetative stage of a plant’s growth cycle. This is when the plant is focusing on leaf and stem development rather than producing flowers or fruits.
Step-by-Step Guide
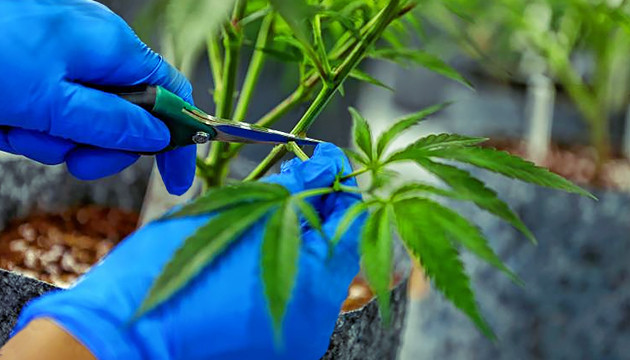
- Prepare Your Tools: For the process, all you need is a pair of sharp, clean pruning shears or scissors. It’s crucial to sterilize your tools before and after use to prevent the spread of disease.
- Identify the Leaves to Remove: Look for older, larger leaves that are blocking light to the lower part of the plant. Removal of these leaves will allow more light to reach young leaves, encouraging growth. Also, consider removing leaves that look infected or infested to prevent the spread of pests or diseases.
- Cut Away the Leaves: Carefully cut the leaf stem as close to the main stem as possible without damaging it. Make clean cuts to prevent damaging the plant and make healing easier.
- Monitor Your Plant’s Response: After defoliation, watch your plant closely for a few days. It’s normal for the plant to be slightly stressed after the process. However, it should bounce back in a few days and start showing signs of new growth. If the plant appears to be in distress, it may be a sign that you’ve removed too many leaves, or the plant was not healthy enough to withstand the process in the first place.
- Repeat as Necessary: Depending on how your plant responds, you might need to repeat the process. Always give your plant time to recover before you do it again.
Defoliating Autoflowers: A Careful Approach
Autoflowers have a shorter life cycle, making it a slightly trickier task. It’s vital to defoliate autoflowers cautiously, as overdoing it can lead to stress and limit their growth potential. Here’s a step-by-step guide:
- Identify the Right Timing: The ideal time is just before they transition into the flowering stage. This is typically 3–4 weeks after planting.
- Choose the Right Leaves: Just like regular plants, you should aim to remove larger, older leaves that are inhibiting light penetration to the lower part of the plant.
- Be Gentle: Given their short life cycle, autoflowers can be sensitive to the process. Always prioritize the plant’s health and refrain from removing more than 20% of the leaves at a time.
- Monitor and Repeat if Necessary: After the process, monitor them closely. Depending on the reaction, you may need to repeat the process, but always ensure the plant has enough time to recover before the next round.
Various Techniques
While the step-by-step process outlines the basic approach, there are several techniques that gardeners can use, particularly when dealing with autoflowers. Each technique comes with its own unique benefits, and the choice often depends on the specific needs of the plant and the gardener’s comfort level. Here are a few commonly used techniques:
- Selective: This technique involves carefully choosing which leaves to remove based on the plant’s current status. It’s a gradual and measured approach where you only remove leaves that are blocking light to the lower parts of the plant or are diseased or infested. This is an ideal technique for beginners and for those who are defoliating for the first time.
- Total: This is a more aggressive strategy where you remove all the fan leaves of the plant, leaving only the bud sites. This technique is usually meant for mature and healthy plants that can withstand such extreme pruning. While it can potentially lead to impressive results in terms of yield, it also poses a higher risk and should only be attempted by experienced growers.
- Schwazzing: This is a high-intensity technique that involves removing all the fan leaves at particular stages of the plant’s life cycle. It’s typically employed at the beginning of the flowering stage and then again a few weeks later. While schwazzing can significantly boost your plant’s productivity, it’s a high-risk technique that requires a deep understanding of the plant’s health and growth stages.
- Lollipopping: Lollipopping involves removing all growths at the base of the plant to focus the plant’s energy on the top buds. As the name suggests, this leaves the plant resembling a lollipop with a barren stem and a leafy canopy.
Conclusion
Defoliation is a powerful practice that can help optimize your plant’s health and productivity. When done correctly and with the right techniques, it can lead to healthier plants, larger yields, and better-quality buds. However, it’s crucial to approach it carefully, always prioritizing the plant’s health above all else. With this guide in hand, you have all the information you need to start defoliating your plants and reaping their benefits. Remember, practice makes perfect, so don’t be afraid to experiment and find the right approach for your specific plants and gardening style.