Step 1: Choose the Electrode
The first step of TIG welding is to choose your electrode. You can get electrodes that are pure tungsten or ones that have some alloys in them. The difference between the two is pretty simple; they just create different looking welds and behave differently on different metals. Pure tungsten electrodes are more stable and create a steel-like appearance while the alloy electrodes are better for stainless steel.
Step 2: Grind the Electrode
This step might not be necessary if you’re welding with an electrode that has a protective coating on it. Just go to the next step, insert your electrode into its collet, and start welding. If your electrode still has the powdery stuff on it then you have to grind it until it’s shiny. You can use either an angle grinder or a Dremel Tool with a special wheel for grinding.
Be careful not to touch the powdery stuff with your bare skin; it is very toxic and will give you chemical burn.
Step 3: Insert the Electrode Into Its Collet
When you’re inserting the electrode into its collet make sure you push it all the way in until it’s flush with the collet. If you don’t push it in all the way then you’ll short out your machine and that’s not good.
Step 4: Choose the Settings
The next step is to choose the settings for TIG welding. There are only three steps, but one particular setting is extremely important when starting off. If you know how to use a multi-meter and do a little bit of math then you can get away with just turning different knobs until you start seeing arcs and then write down the numbers that correspond to the knob settings. Otherwise, just turn them all to an equal value and we’ll do some math later so your TIG won’t look like crap after only two welds.
The settings are these 3 knobs, from left to right:
Electrode Current (Amps) Gas Flow (cfh or lph) Voltage
So these three settings determine the heat of the arc and how much shielding gas you’re using. They also determine how fast you can travel with the torch and make a bead. Here’s a little video about how different settings affect the final product:
Step 5: Turn on the Gas
This is pretty simple, you just turn this knob to adjust the flow of your shielding gas (your Argon/Helium mix). If you’re using pure argon then just set it at 20 for now. If you’re using 100% helium then set it to 40 for now. Never use 100% helium when welding steel, always use a mixture of argon and helium (usually around 50/50).
Step 6: Prepare Metal and Welding Table
It’s best if the metal that you’re working on is really clean; this means no grease, oil, rust, paint, dirt, or anything else for that matter. If it’s extremely greasy then you can actually blow holes in the metal, so take your time and clean everything really well. It’s also a good idea to turn on a fan while you’re cleaning all that stuff off because there will be a bunch of dust flying around from grinding/sanding down the electrode.
Another important thing to do is prepare your welding table/area. Make sure that you’re not standing on carpet because it will start smoking really bad once the electrode touches it. Also, make sure that there’s nothing sitting on top of the table that can fall off and hit the metal while you’re welding. The only things that should be on top of your welding table are the electrodes, collets, and fluxes that you’re using.
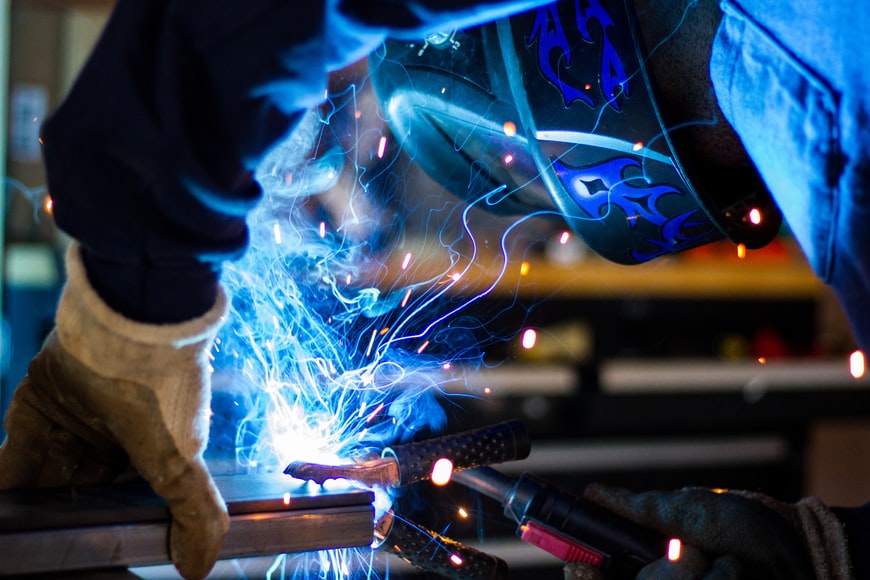
Step 7: Get Dressed Up!
You should wear gloves for this part because if you touch the electrode then it will be very easy to drop it by accident so gloves are good insurance. Also make sure that you have a long sleeved shirt on and that you’re wearing pants because the sparks from welding can sometimes land on your bare skin and give you a nasty burn. Helmets and safety glasses should always be worn when grinding and welding, so get used to wearing them all the time.
Step 8: One Last Check
Before we do anything we should check our settings really quick and make sure that we aren’t about to set our metal on fire with a bad-looking weld. One quick way to check is by holding your welding helmet up in front of the TIG and turning it on (by pressing the green button). If you’re doing everything right then you’ll see an arc with a nice-looking little bead:
Step 9: Weld!
Time to finally give it a shot. Start off by making sure that you have the torch set up so that there’s plenty of metal above the electrode. It should look sort of like this:
Then, just push the electrode against the metal so that it touches and slowly pull the trigger on your machine. It should look something like this:
Now, if you have the electrode current set too high or your wire feed is way too fast for your liking then it’s going to look like complete ass. Your weld bead will be all fat and won’t resemble anything that looks like a real weld. Too low of an electrode current/wire feed speed will just make a bunch of spatter every time you pull the trigger so it’s best to set both knobs in the middle at 4.5 and 10 respectively.